Essential Tips on How to Install a Roof Vent
Essential Tips on How to Install a Roof Vent

Key Takeaways
- Importance of Roof Ventilation: Proper roof ventilation is crucial for preventing mold growth, reducing energy costs, and protecting roofing materials.
- Types of Roof Vents: Different vents serve specific purposes—ridge vents, soffit vents, gable vents, static vents, and power vents.
- Preparation and Assessment: Assess your attic's ventilation needs based on size, climate, and existing setup. Gather necessary tools and materials before starting.
- Installation Steps: Choose the right location, prepare the roof, install the vent, seal the installation, and replace roofing material correctly.
- Common Challenges: Address leaks by ensuring proper sealing and maintain adequate ventilation by potentially adding more vents.
- Maintenance: Regularly inspect and maintain roof vents to ensure they are functioning correctly and address any issues promptly.
A well-ventilated roof is crucial for maintaining a comfortable and energy-efficient home. Installing a roof vent helps regulate temperature and moisture levels in your attic, preventing issues like mold growth and overheating. But how do you go about installing a roof vent effectively? This guide will walk you through the essential steps and considerations, offering practical tips to ensure a successful installation.
Whether you're a DIY enthusiast or planning a professional upgrade, understanding how to install a roof vent can make a significant difference in your home's performance.
Understanding Roof Ventilation
Why Roof Ventilation Matters
Proper roof ventilation is vital for maintaining the health and efficiency of your home. It allows hot, humid air to escape from the attic, reducing the risk of damage to roofing materials and insulation. Effective ventilation also helps lower cooling costs during hot months and prevents ice damming in winter.
Types of Roof Vents
There are several types of roof vents, each serving a specific purpose:
- Ridge Vents: Installed along the roof's peak, ridge vents allow hot air to escape naturally through the highest point.
- Soffit Vents: Placed under the eaves, soffit vents provide fresh air intake for the attic.
- Gable Vents: Located on the gable ends of the roof, these vents allow for cross-ventilation.
- Static Vents: These are non-moving vents that rely on natural convection to move air.
- Power Vents: Powered by an electric fan, power vents actively expel hot air from the attic.
Preparing for Installation
Assessing Your Ventilation Needs
Before you start, assess your attic's ventilation requirements. The size and type of roof vent you'll need depend on factors like your attic's size, the climate, and the existing ventilation setup.
The general rule of thumb is to have 1 square foot of ventilation for every 300 square feet of attic space, with equal intake and exhaust ventilation.
Gathering Tools and Materials
You'll need several tools and materials for the installation:
- Roof vent kit (including the vent itself and any flashing or installation hardware)
- Tape measure
- Circular saw or jigsaw
- Roofing nails or screws
- Roofing cement or sealant
- Ladder and safety equipment (harness, helmet, etc.)
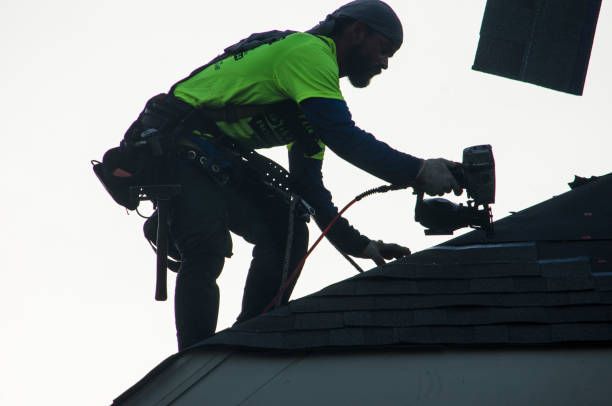
Step-by-Step Installation Guide
1. Choose the Location
Select the optimal location for your roof vent. For ridge vents, install along the roof's peak. For other types, choose a spot that ensures good air circulation and avoids obstructing other roof elements. Mark the location on your roof.
2. Prepare the Roof
Using your tape measure and circular saw, cut the necessary opening for the vent. For ridge vents, this involves cutting a slot along the peak. For other vents, you'll need to remove a section of shingles or roofing material. Make sure to wear safety gear and follow proper ladder safety protocols.
3. Install the Vent
Position the vent over the opening and align it according to the manufacturer's instructions. For ridge vents, the vent typically overlaps the roofing material, creating a seal. For other vents, place the vent in the opening and secure it with nails or screws.
4. Seal the Installation
Apply roofing cement or sealant around the edges of the vent to prevent leaks. This step is crucial for ensuring that your roof remains watertight. Smooth the sealant to create a consistent barrier against moisture.
5. Replace Roofing Material
Reinstall any removed shingles or roofing material around the vent. Ensure that the shingles overlap the vent correctly and that there are no gaps or loose areas.
Common Challenges and Solutions
Leaks and Water Damage
One of the most common issues with roof vent installation is improper sealing, which can lead to leaks. To prevent this, ensure that all seams and edges are sealed correctly and that roofing materials are replaced securely.
Inadequate Ventilation
If you notice that your attic is still not adequately ventilated after installation, you may need to add more vents or adjust their placement. Consult with a roofing professional to assess and correct ventilation issues.
Maintenance and Inspection
Regularly inspect your roof vents to ensure they are functioning correctly. Check for signs of damage, such as cracks or loose fittings, and address any issues promptly to maintain optimal ventilation.
For all your roofing needs, trust Spring Valley Roofing, located at 2 W. Market St., West Chester, PA 19382. Contact us at (610) 948-5207 for professional and reliable roofing services.
Conclusion
Installing a roof vent is an essential step in maintaining a healthy and energy-efficient home. By understanding how to install a roof vent correctly and addressing common challenges, you can improve your attic's ventilation and extend the lifespan of your roofing system.
FAQs
Q: Why is roof ventilation important?
A: Proper roof ventilation helps prevent mold growth, reduces energy costs, and protects roofing materials by allowing hot, humid air to escape from the attic.
Q: What types of roof vents are there?
A: Common types include ridge vents, soffit vents, gable vents, static vents, and power vents, each serving a specific ventilation purpose.
Q: How do I assess my attic’s ventilation needs?
A: Assess based on your attic’s size, climate, and existing ventilation setup. A general rule is 1 square foot of ventilation for every 300 square feet of attic space, with balanced intake and exhaust ventilation.